

Helpwise offers customizations for the Chat Widget so that it matches the look and feel of your website.
Click on the “Interact” menu in the navbar and then select the chat widget you want to customise from the list.
Click on the “Settings” section on the left sidebar. On the right side, you will find various options to customize your chat widget.

Live Chat Widget Customizations
Customize basic settings of the chat widget like Text on buttons, the colour of the widget, etc.
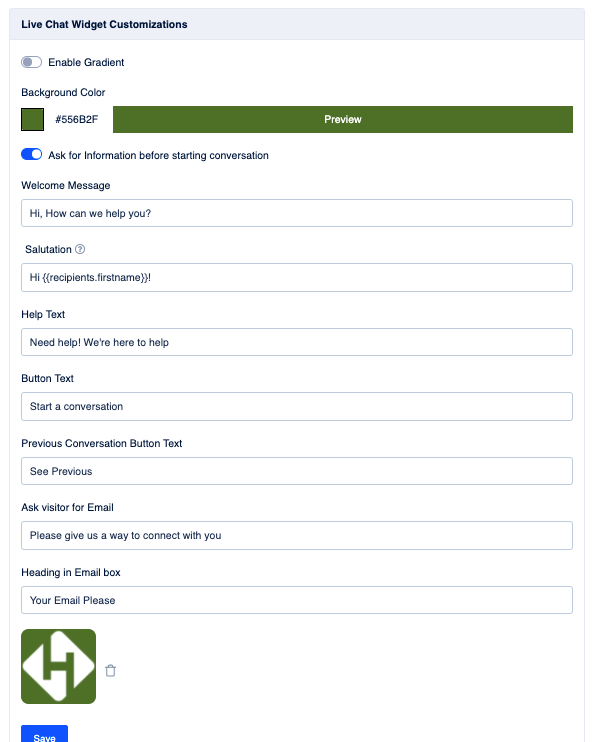
- Logo: You can upload your website logo to personalize the chat widget.
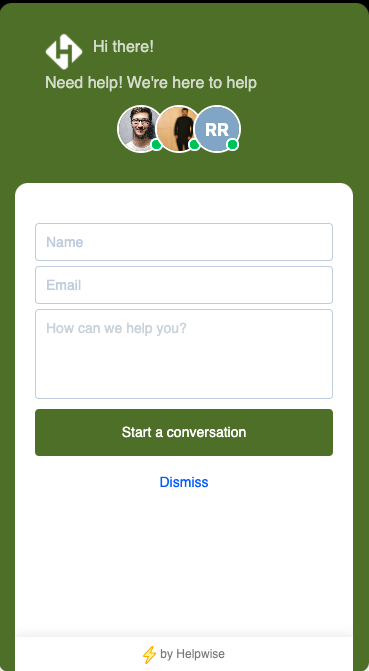
- Ask for information before starting the conversation: It helps you in capturing the data of the visitors on your website. It triggers the form the detail capture form when the visitor tries to start a new conversation as shown in the below image. Once the visitor fills the form, it will not get triggered to ask the detail of the same visitor again.
- Enable Gradient: This allows you to add a gradient in your widget background color.
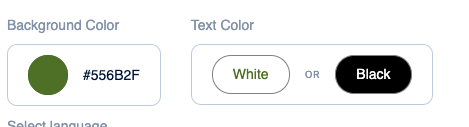
- Background Color: This allows you to change the background color of your widget.
- Text Color: Helpwise has an algorithm in place to decide the color from white or black based on the background color. But you can still switch between black and white color manually.
- Select Language: it allows you to choose a language for your chat widget. It will translate all the hardcoded values, rest values are customizable i.e. you can provide their value by yourself.
- Salutation: It allows you to customize the text on the header of the home screen page of the widget.
- Help Text: Help text is the text under the Salutation on the header of the home screen page of the widget.
- Button Text: This allows you to customize the text on the button to start a new conversation.
- Previous conversation button text: This allows you to customize the text on the button to open previous conversations.
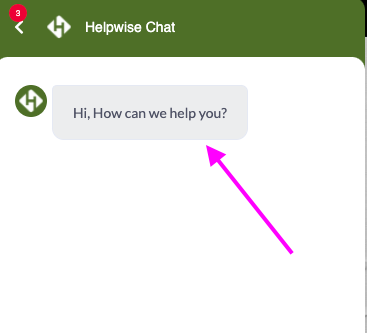
- Welcome Message: It allows you to display a message to the visitor on the chat message screen as a welcome message.

- Ask visitor for email: This option helps you to collect the email of the visitor by sending a message to them. It will work only if the "Ask for information before starting a conversation" option is off.
- Heading in email box: This allows you to customize the text inside the email box triggered inside the message conversation.

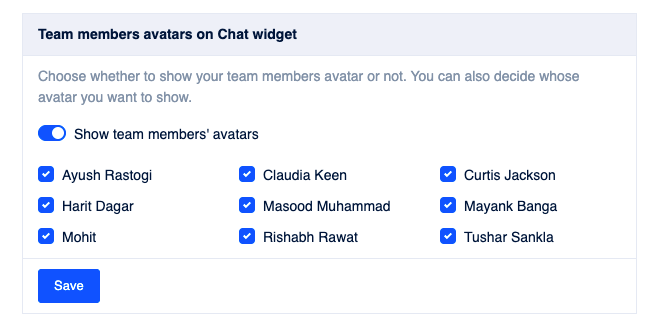
Select team members to show on Live Chat Widget
This section allows you to customize the Avatar icons on the widget home page.
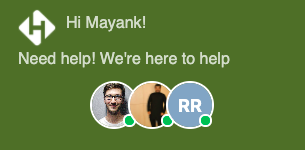
You can decide whether to show your agents avatar icons on the widget or not. If yes then you can select your teammates from the provided list and out of those teammates, a maximum of 5 will be shown on the widget.
Live chat visibility
This section allows you to customize the visibility of the live chat widget on the basis of the type of visitor on your website.
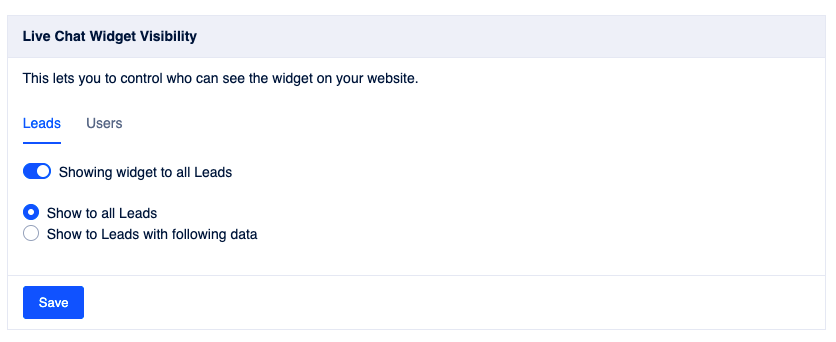
On the basis of the data you pass in the live chat widget script, visitors are categorized into two categories:
- Leads: Visitors whose data is not provided into the chat widget script i.e. email, name, userid.
- Users: Visitors whose data is provided into the chat widget script i.e. email, name, userid (mandatory).
Perform action on your chat widget on the basis of working hours
This section allows you to set working hours for your chat widget. After setting the working hours, you can perform actions on your widget on the basis of working hours. This section is divided into three parts:
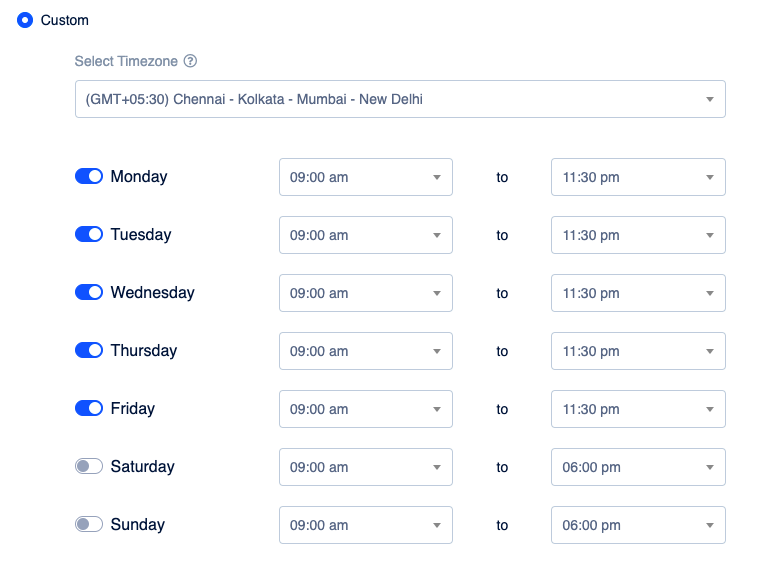
Select working hours
You have three options to select for your working hours as shown in the image.
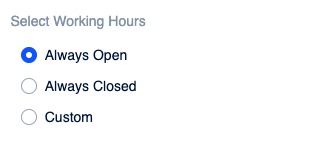
Always Open is the case when your office working hours are 24 x 7. Always Closed is the case when your office is permanently closed. Custom allows you to select the days of the week and the time slot from it.
Perform action on basis of working hours
After selecting your working hours, now you can perform an action on the chat widget on the basis of it. You can select any one of the three provided options.
Enable automated first reply feature on new conversations
This allows you to send an automated reply when the visitor starts a new conversation. You can set messages for both during working hours and after working hours. Helpwise system will process the working hours on the chat widget side and then will trigger the message according to it.

Perform action on Widget visibility
In this option, you can show or hide your chat widget on basis of working hours.

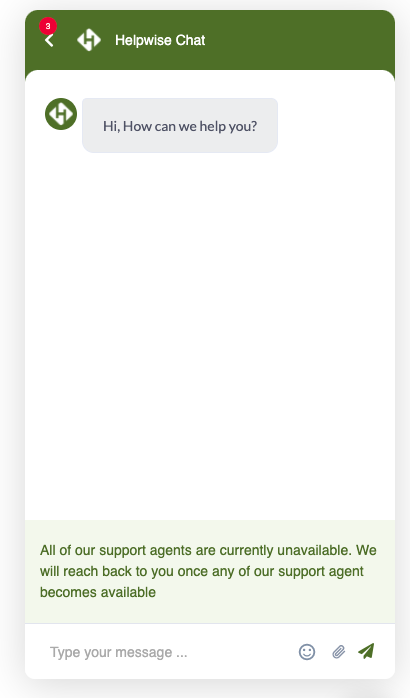
Show the notice on the chat message screen after working hours
This option helps you to add a notice on the chat widget message screen.
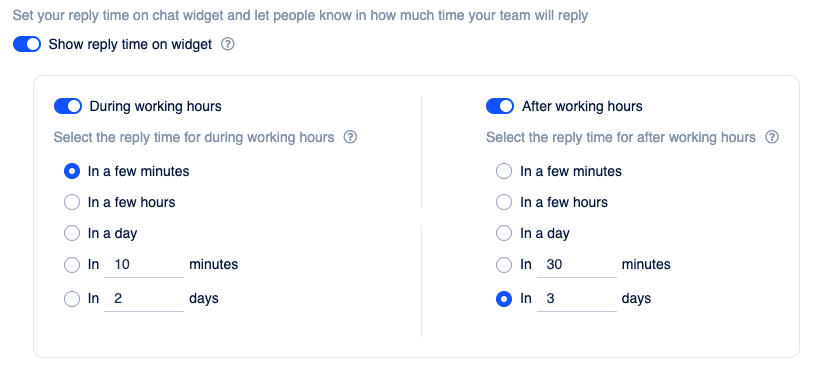
Set your reply time
This section allows you to set the reply time and let the visitor know that how much time you take to reply to your customer. You can even set the reply time on the basis of the working hours along with the option to show reply time or not.
You can also schedule a free demo, to know more about Helpwise and the Helpwise Live chat widget.