💡Product Update: Click here to learn about the improved ClickUp Integration
With Helpwise – ClickUp integration, you can fetch tasks directly in your shared inbox. Connect your shared mailbox with ClickUp and create/update tasks associated with your workspace.
How to connect ClickUp with Helpwise?
See tasks in your shared inbox
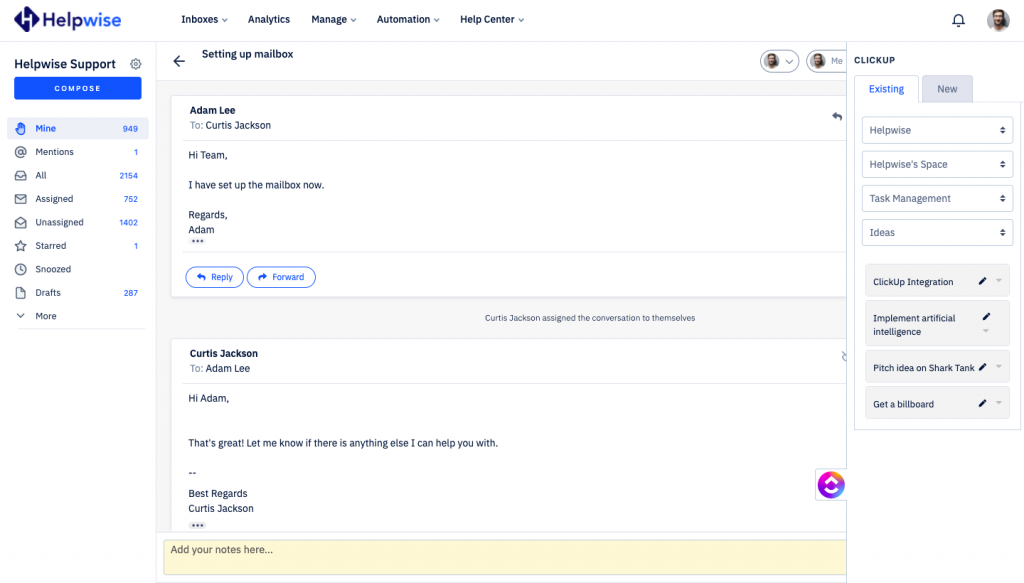
Once you have connected your Helpwise shared inbox with ClickUp, you can easily track the information of your task. Here are the steps:
- Login to your Helpwise account.
- Select the inbox whose emails you wish to see.
- Open an email from any of the tabs (i.e, mine, assigned, sent, etc.)
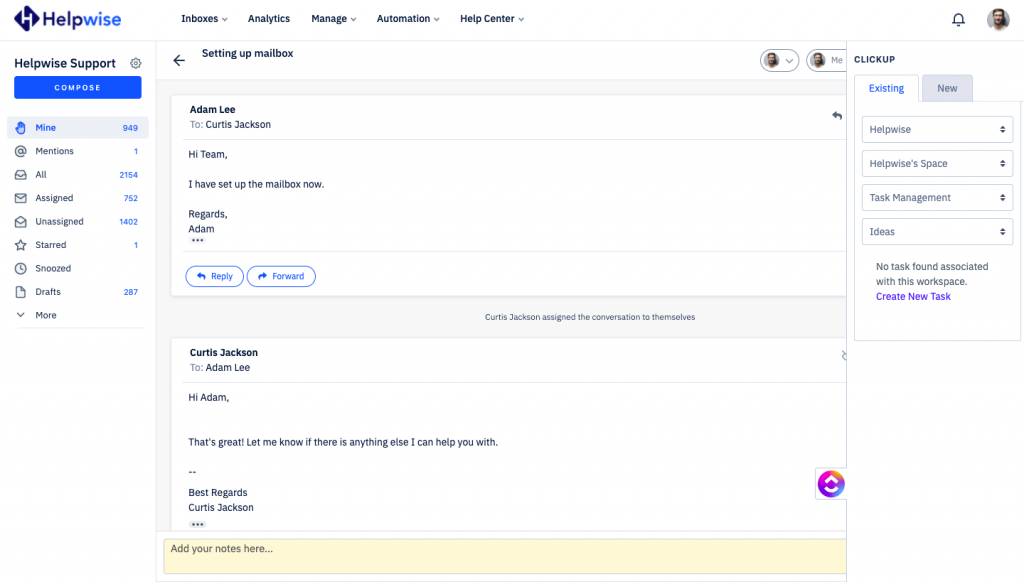
- Now, you will see ClickUp logo on the right side of your screen. Click on that.
- It will open ClickUp panel, which contains the workspace selection dropdown, space selection dropdown, folder selection dropdown and list selection dropdown.
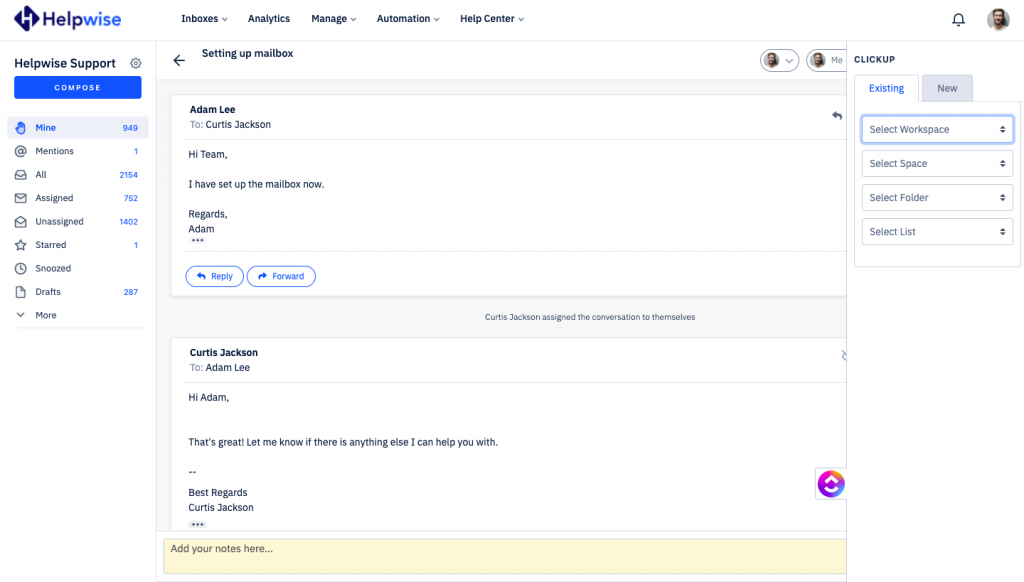
- Select a workspace for which you wish to manage your tasks.
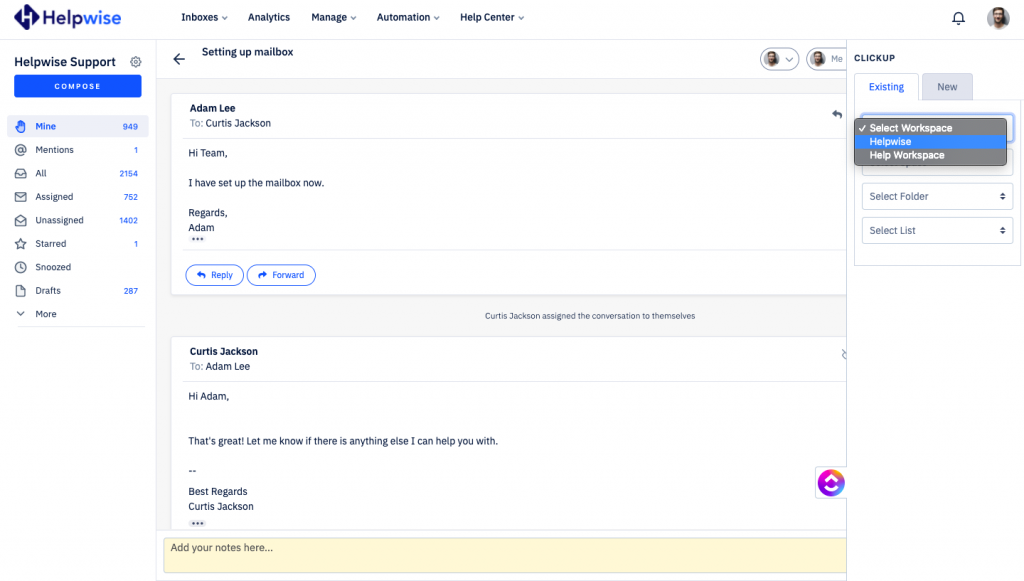
- Select a space for which you wish to manage your tasks.
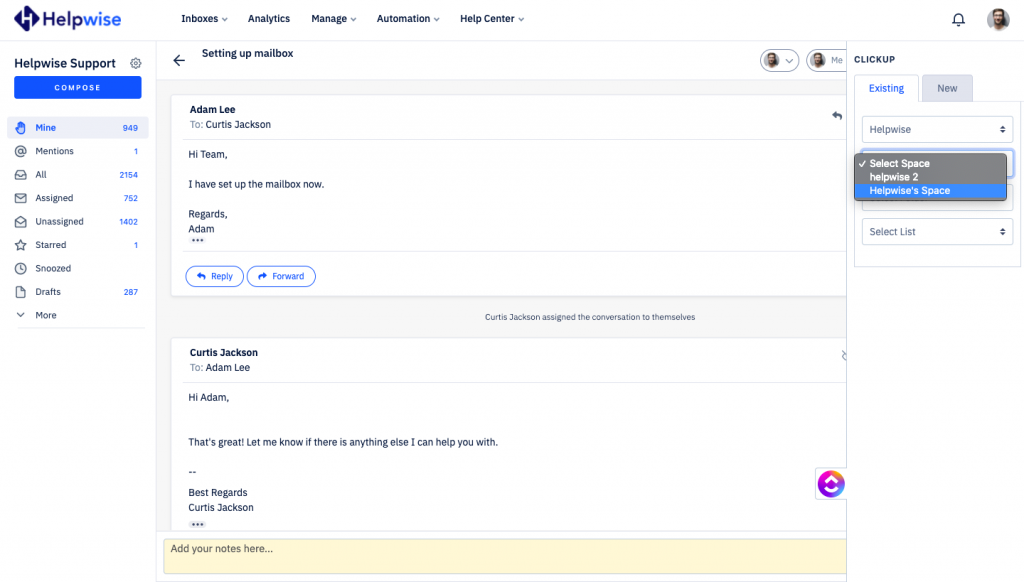
- Select a folder for which you wish to manage your tasks.
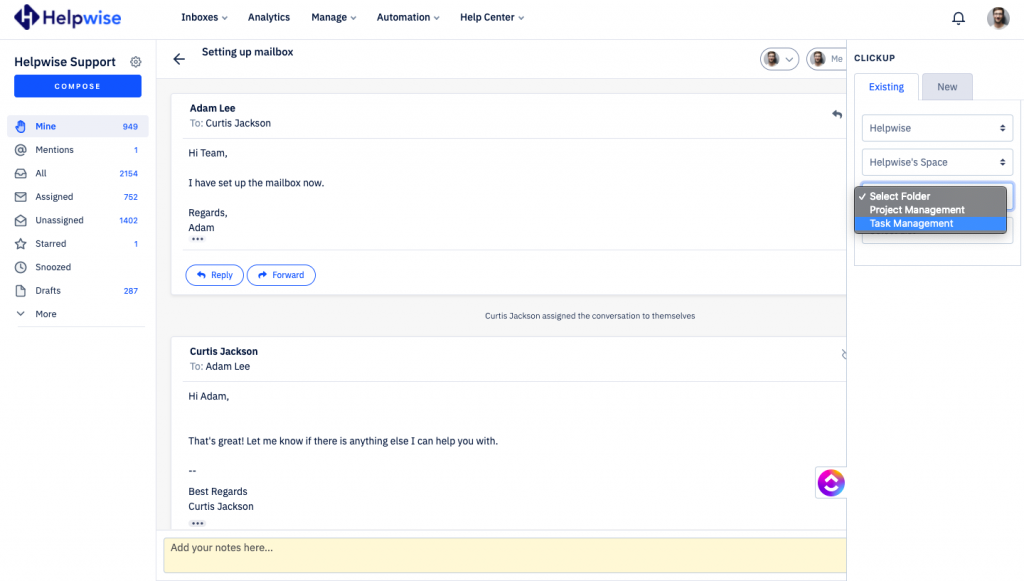
- Select a list for which you wish to manage your tasks.
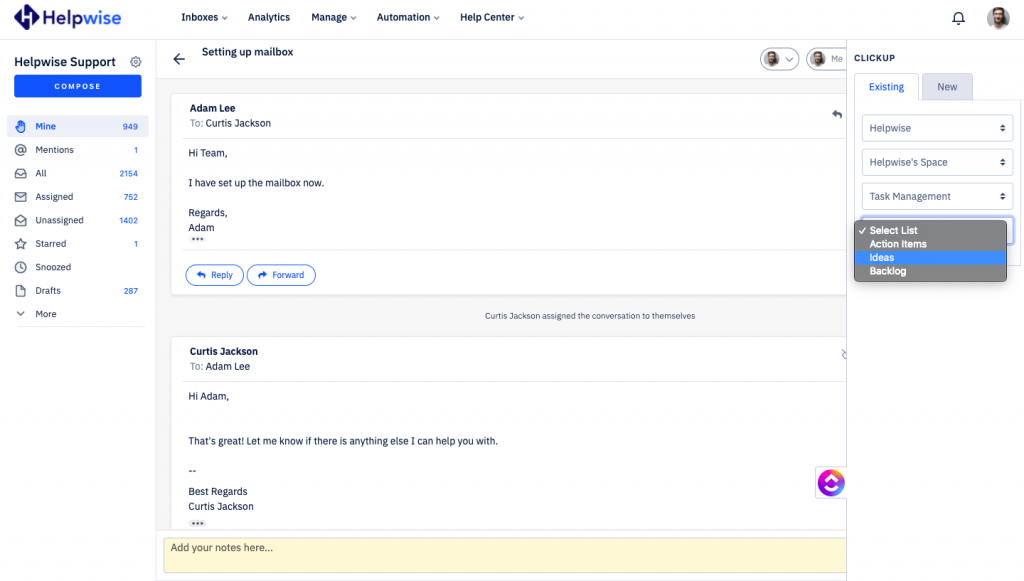
- Helpwise will retrieve the tasks associated with this list, folder, space and workspace.
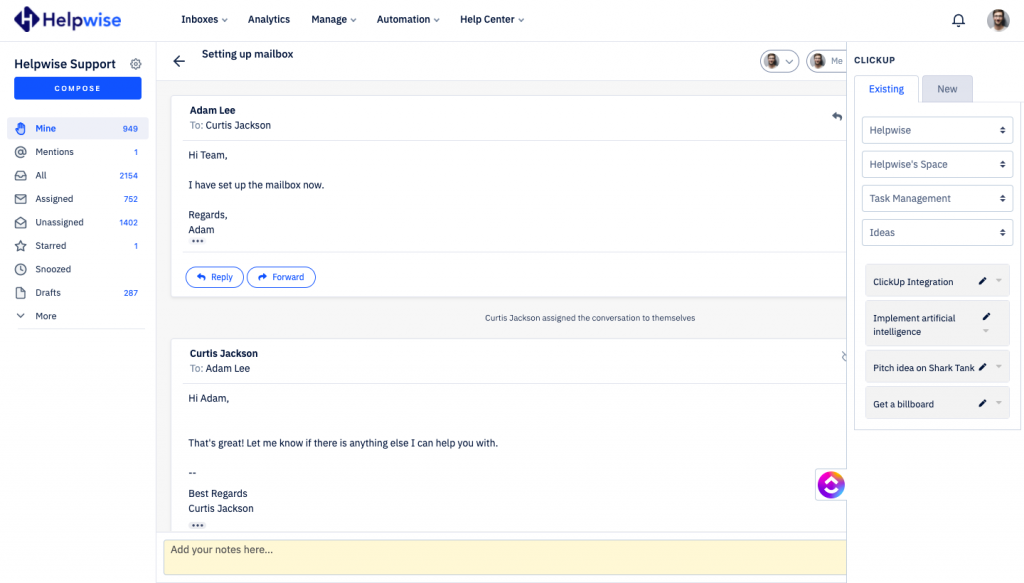
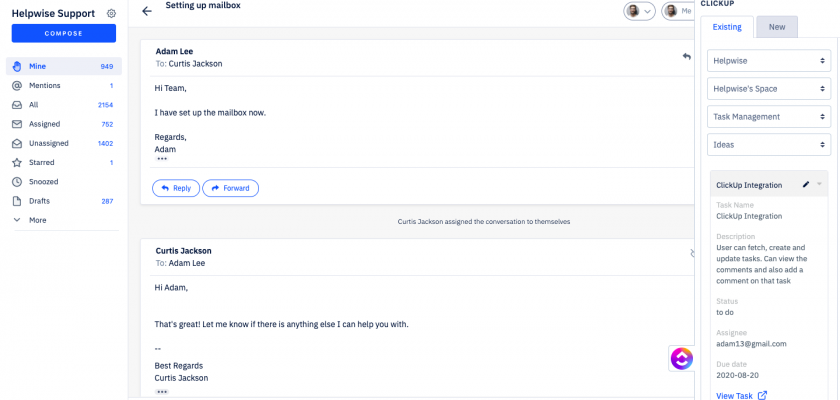
- Click on a particular task to see it’s details.
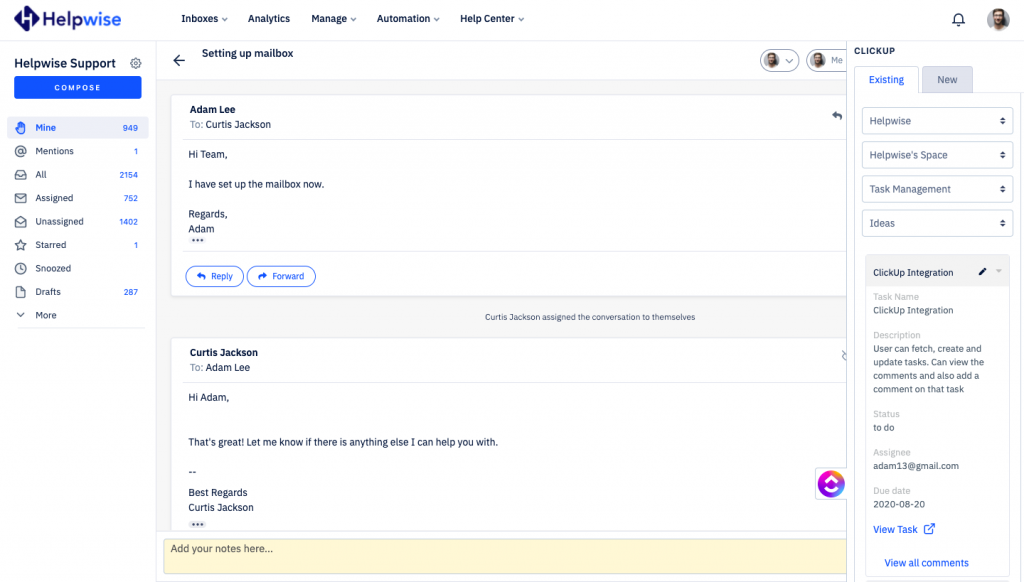
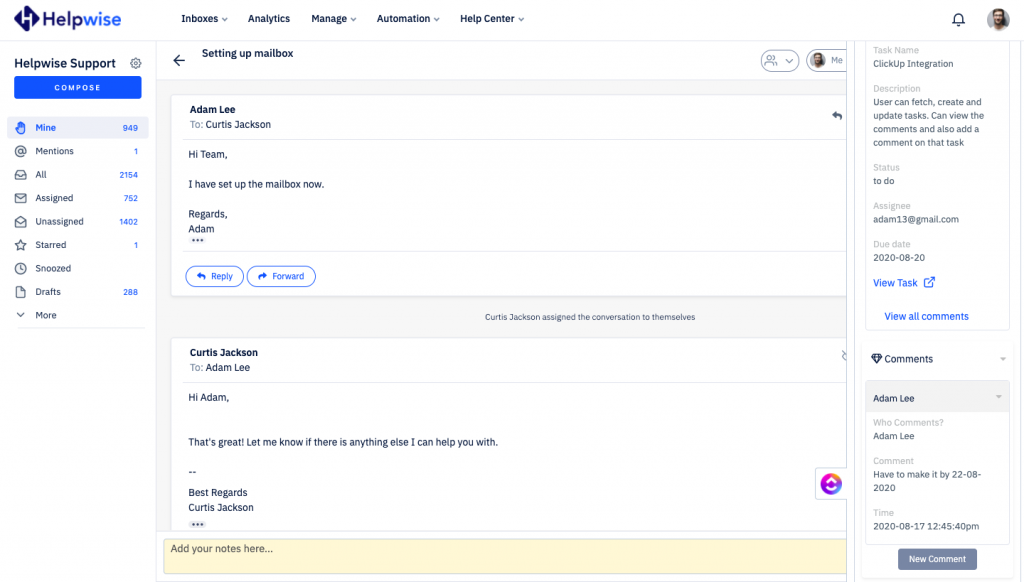
See comments of a task
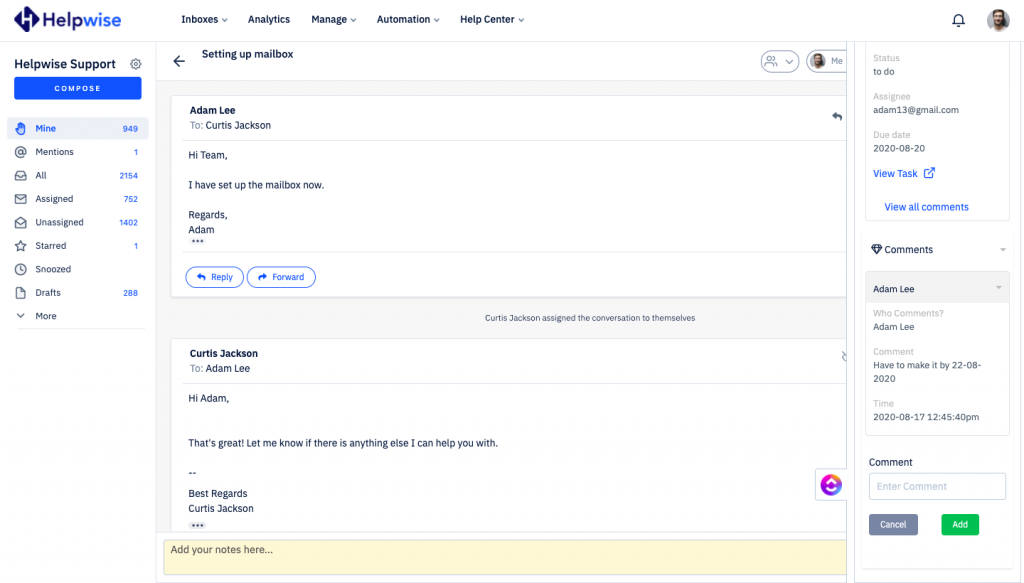
- After you click on a particular task to see it’s information, you can see all the comments in this task by clicking on ‘View all comments’ link and can add a comment by clicking ‘New Comment’.
- You’ve to enter the text and then click on ‘Add’ to add a new comment.
Create new task directly from Helpwise
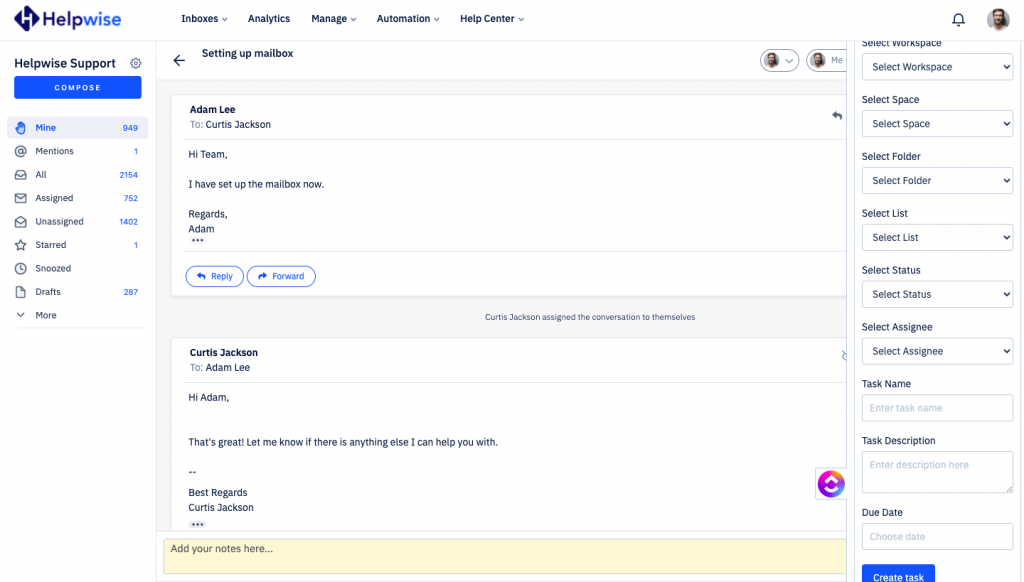
You can also create a new task in ClickUp directly from Helpwise. Follow the steps below to create a task in ClickUp :
- If you don’t have any task then click on “Create New Task” or you can create another task to your existing list by clicking on the “New” tab shown.
- Here you’ve to enter all the information of a task.
- Enter the information and click on “Create Task”. That’s it! You have now created a task in ClickUp directly from your shared mailbox.
