Chatbot is the feature that enables you to trigger messages along with some suggestions to your customers. These suggestions could be related to their common issues. Once they click on the suggestion then the bot performs the next step as per your instructions defined.
To know about, How to create a chatbot follow this guide: https://helpwise.io/help/how-to-setup-chatbot-in-helpwise/
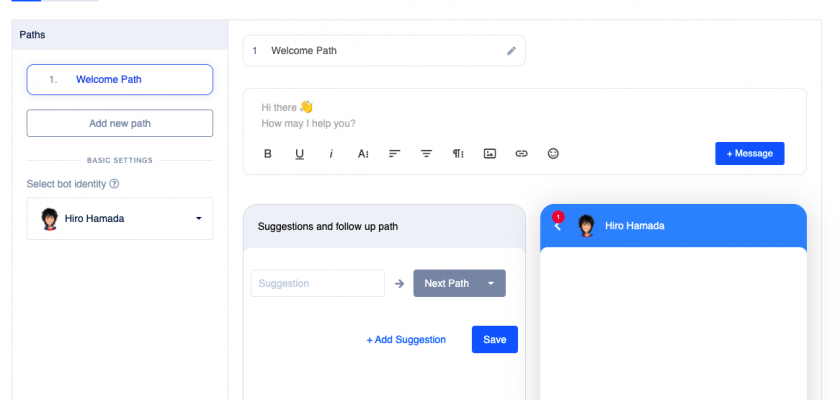
Message bot contains the following sections in it:
- Bot title: This will help you to set a title for your bot. This title is only for your reference and will not be visible on the chat widget side.
- Save/Update button: Based on creating or editing the bot you will find the option to Save the bot or to Update the bot.
- Set Live/Pause/Resume button: These buttons are used to either push your bot live or to pause it. Set Live button appears when you have not pushed the bot live yet. Once you push it live, you will see the Pause/Resume button the next time.
- Basics section: This section allows you to build a bot for your widget. You will find the detailed description of this section in upcoming headings.
- Advance section: This section allows you to set URL filter and Audience filter. You will find the detailed description of this section in upcoming headings.

Basics Section
In this section, you can build your message bot as per your use case.
On the left side, you have the option to define paths for your bot and to select an identity for it. To create a new bot identity for your chatbot go to settings in the left sidebar.
Remember to save your progress of the bot before switching to different section from the left sidebar or before closing the tab.
On the right side, you have to define the data inside the paths that you have created on left side. In this, you get the option to write messages, add suggestions or add actions for each path.
Here is the quick suggestion/steps that you can follow to create a bot for your chat widget.
Build Welcome Path
“Welcome Path” is the initial path i.e. it will execute first, whenever the bot is initiated. This means that messages defined in this path will appear on the chat window of the widget along with the defined suggestion. Then based on the suggestion selected, the next path will get executed.
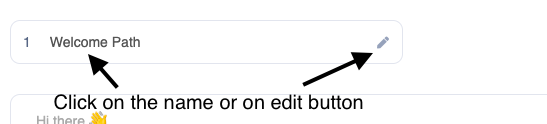
How to change the name of the path?
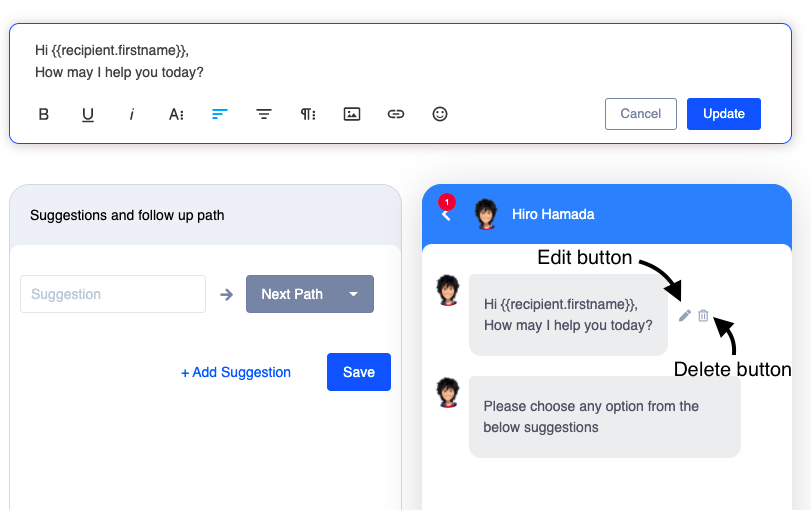
You can change the name of the path either by clicking on the name (on the right side) or by clicking on the edit button (as shown in the image below). After changing the name, you can press enter key or click on the tick icon on the right of the edit button to update the name.
Note: this name is also for your reference only. It will not be visible on the chat widget side.
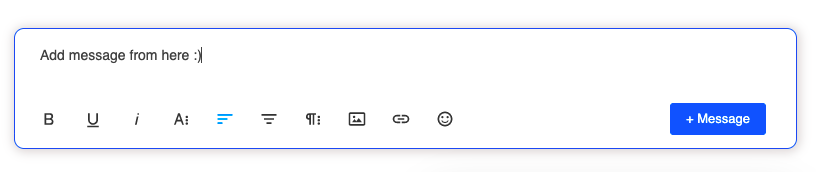
How to add/edit messages in the path?
You can enter the message in the editor provided under the name of the path. You can format the message by using the toolbar provided in the editor. There is also an option to add a variable to make your message more personalized. Currently the supported variable is {{recipient.firstname}}.
You can press cmd+enter or click on “+Message” button to add this message in your bot path. This helps you to add multiple messages, each message displays one after another on the widget.
In order to edit or delete the message, you can go to the preview section and hover on the message that you have to edit. You will then see two buttons beside your message, on the left side, it will be the edit button followed by the delete button.
In case of edit, message will appear back in editor and then you can update the message and press cmd+enter or click on update button to update it.
How to add suggestions?
Suggestions helps you to add the most frequently asked questions as an option that visitor can select in chat window of chat widget. You can associate any bot path to the suggestion, so that if a person clicks on any suggestion then that bot path will be executed.
To add suggestions in your bot path follow these steps:
- Enter the suggestion in the provided input box under the “Suggestions and follow up path” section.
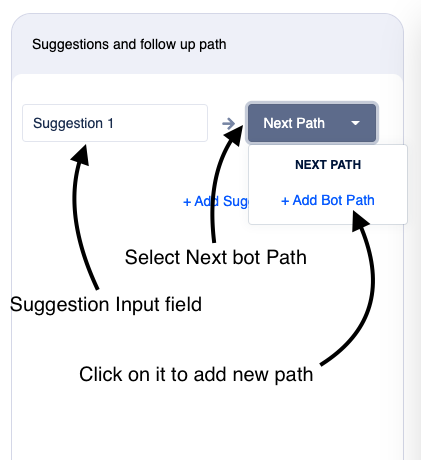
- Select the next path from the dropdown beside the input box.
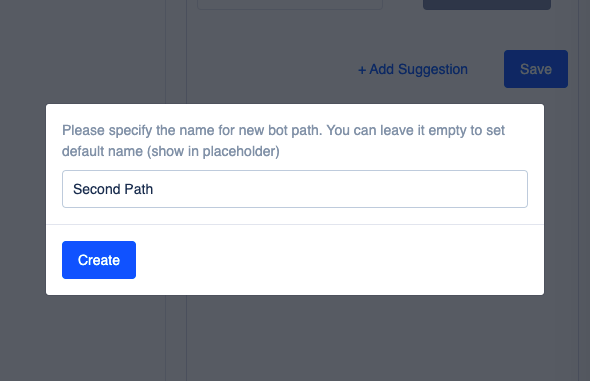
if you have not created any bot path yet then click on “Add Bot Path” inside the dropdown. It will show you a pop-up to fill in the bot name. Fill in the bot name and click on “create”. In this case, you have to click on the dropdown again and select the path for it.
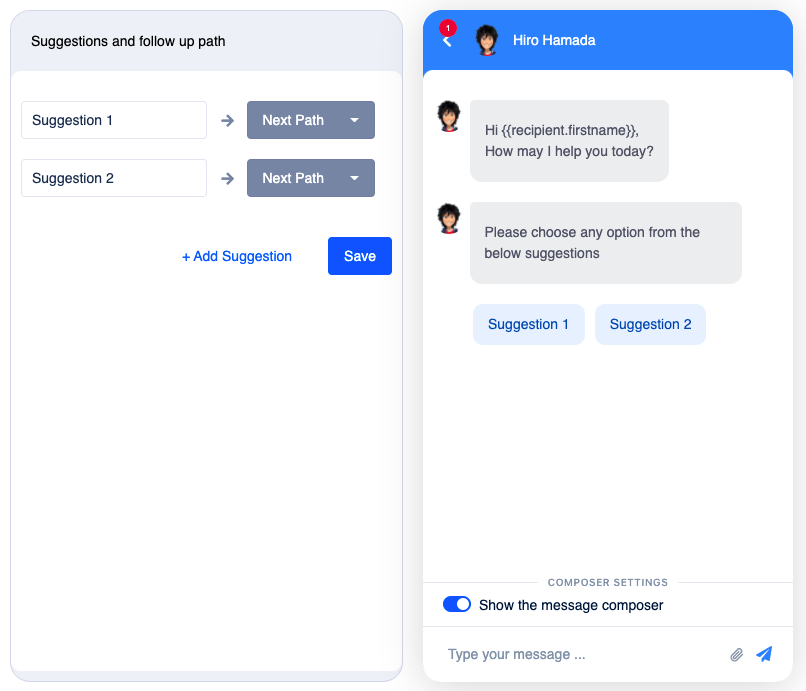
- Click on “+Add Suggestion” if you want to add more suggestions. If not, then click on the “Save” button to add the suggestion.
Now you will be able to see the suggestion in the preview chat window (as shown in the below picture).
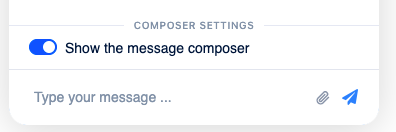
How to handle the composer in a bot path?
You can turn show or hide the composer based on your use case. In order to handle that, Click on the switch-like button above the composer in the chat preview window.
Now that you have built the “Welcome Path”, you can work on the follow up path that you have added as next path in Suggestion.
Building the follow-up Path
You can add another bot path first before adding it as a follow-up path for any suggestion. In this case, you have to click on the “Add Bot Path” in the left section and it will add a path in the list. Now you can use this path as the next path for a suggestion in a different bot path.
The follow up path is almost similar to the Welcome Path. But in this, you have two options:
- Continue bot with Suggestions or
- End bot with Actions
After adding messages in this path then you can either choose one of the options from the above-mentioned points or choose none.
What happens if you choose:
Continue bot with Suggestions
In this case, you can continue your bot by adding suggestions to your bot path. This case will become similar to the Welcome Path case.
End bot with Actions
In this case, you can decide the action that is to be taken for the ongoing conversation. In this, you have the following three actions
- Assign Conversation to: This options allows you have to assign the ongoing conversation to the person you select from the list besides it
- Close Conversation: This action will close the ongoing conversation on the inbox side.
- Tag Conversation: Based on the suggestions selected by the person, you can add tag on your conversation from the list besides it.
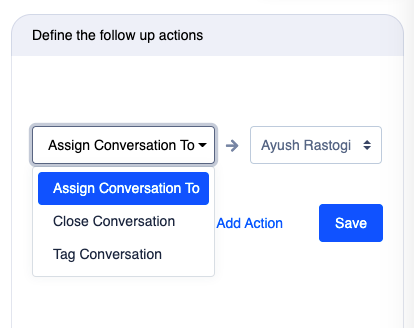
You can add multiple actions by clicking on “+Add Action” button and at last you can save the actions by click on the “Save” button.
Remember: This action will be taken on the chat inbox side of this conversation i.e visitor on the widget will not be noticing any of this action.
None of these options
In this case, your bot will be ended without performing any action.
Now you have completed your follow-up path too. Similarly, you can build as many paths as you wish to.
Advance Section
The Advance section allows you to add filters to your bot. Filters allow you to add conditions, which are required to be fulfilled in order to trigger the bot to the user or the visitor. Here are options that you get for the filters:
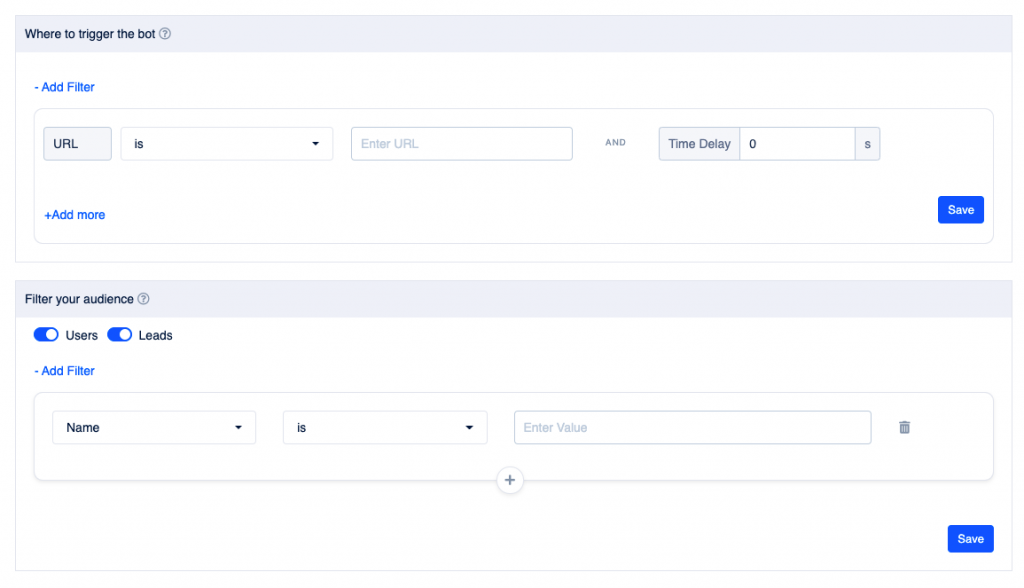
Where to trigger the bot
This allows you to trigger the bot on a particular page or certain pages matching with the URL
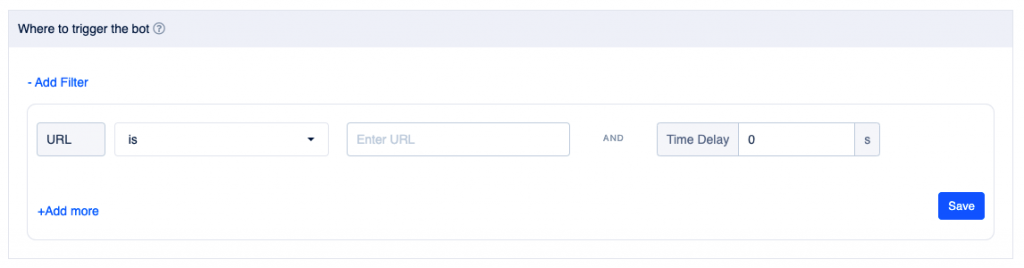
Time Delay
You can also add a time delay to show the message. This means when the user comes to your website and stays for a set time, then the message will show up to him.
Time delay will not have any effect on the message bot (it will be considered in case of engage bot only).

Add More
This helps you to add more than one filter when deciding where to trigger the bot.

Once you have added your filters, you can click on the Save button to apply the settings.


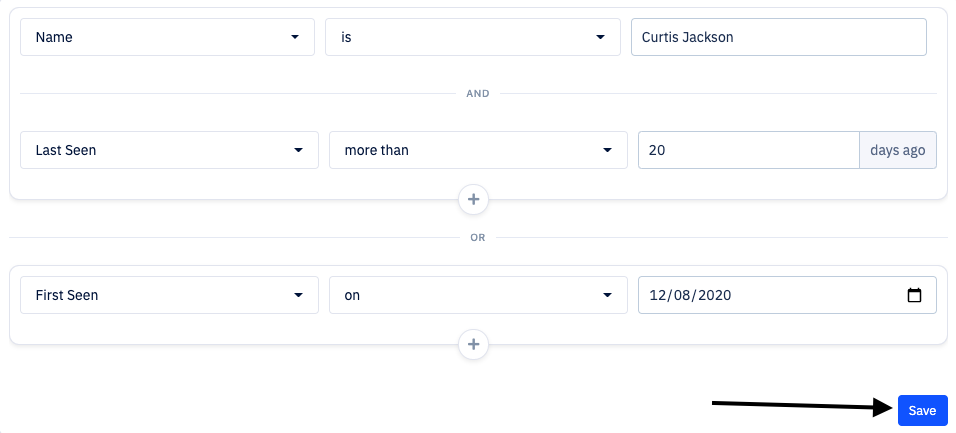
Filter Audience
You can also trigger a bot to a certain category of the audience, by using this filter. It allows you to filter the audience list based on name, email, join date, and other parameters based on the user.
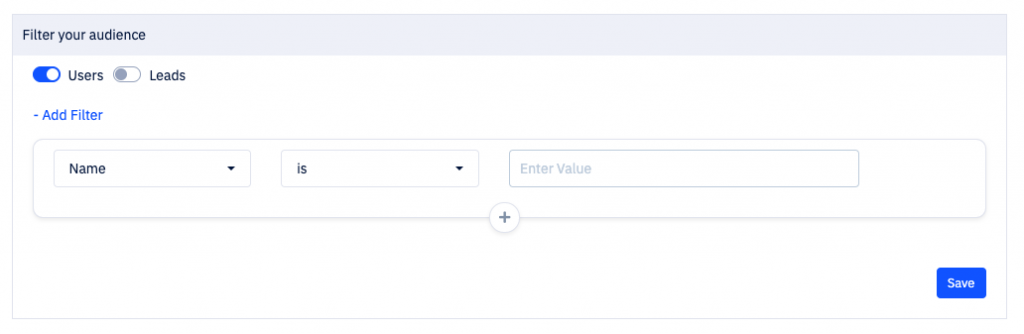
The first option you get in this is to select the type of person, you want to trigger this bot. There can be two types of the person:
- Users: Person who are the users of your product and for whom you have provided their user id in the parameters of the chat widget.
- Leads: Leads are those person whose user id is not passed in the parameters of the chat widget.
You can turn on both Users and Leads if you want to cover the whole audience of your product.
Information Filter
In this, you have to select the property or the information of the person on the basis of which you have to apply the filter.
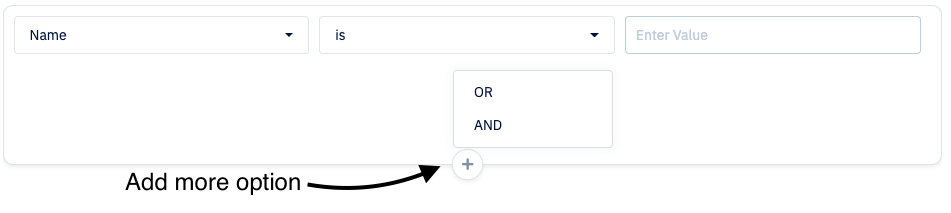
Sub Filter

Like where to trigger the bot filter, it also allows other three options which are as follows:
Delete
It is the same as the where to send option, it deletes any of the filters, which you want to delete.

Add More
Unlike where to trigger the bot, it is denoted by “+” icon situated at the bottom center of the row as shown in the below picture. It allows you to add ‘AND’ and ‘OR’ conditions in the Whom to send filters.
Save
It saves the filters that you have added. It saves the options and makes them as labels and in a readable form.

Now you have completed the setup of your bot feature. You are ready to Save
For further questions feel free to reach out to our chat support or schedule a free demo call with us.